News
DIY Delight: How to Install Your Own Catback or Axleback Exhaust
Introduction: The Thrill of a DIY Exhaust Upgrade
Are you a car or truck enthusiast looking to add some extra oomph to your ride? Upgrading your exhaust system can be a thrilling way to do just that. While many people opt to visit a muffler shop for installation, you might be surprised to learn that installing your own catback or axleback exhaust system is not only achievable but also incredibly rewarding. In this guide, we will take you through the process step by step and show you how you can take matters into your own hands, save money, and unleash the full potential of your vehicle.
Section 1: The Basics of Catback and Axleback Exhaust Systems
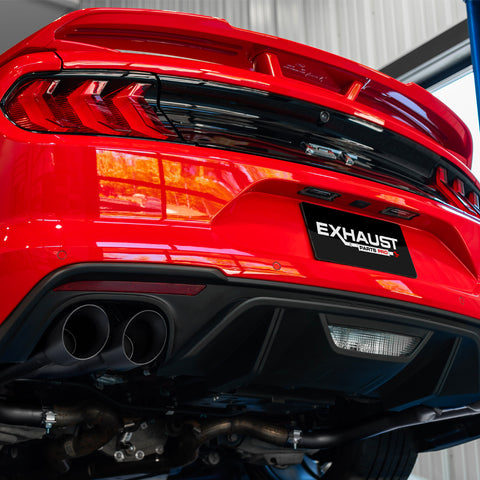
Before we dive into the DIY aspect, let's quickly understand the types of exhaust systems available. A catback exhaust system replaces components from the catalytic converter to the tailpipe, allowing for improved airflow and sound. On the other hand, an axleback system focuses solely on the rear portion of the exhaust, mainly altering the sound profile without significantly affecting performance. These systems are popular upgrades among car and truck enthusiasts looking to enhance both the aesthetics and sound of their vehicles.
Section 2: The Tools You'll Need
One of the most appealing aspects of installing your own catback or axleback exhaust is that you won't need a vast array of specialized tools. In fact, you likely have most of what's required already in your toolbox. Here's a list of the essential tools you'll need:
- Jack and Jack Stands: These are necessary for lifting your car or truck safely off the ground to access the exhaust system.
- Wrenches and Sockets: You'll need a variety of these in different sizes to remove and replace bolts and nuts.
- Pliers: Useful for removing stubborn rubber hangers or other components.
- Screwdrivers: Both flathead and Phillips-head screwdrivers will come in handy for different parts of the installation.
- Safety Gear: Don't forget gloves and safety glasses to protect yourself during the installation.
Having these common tools at your disposal means you won't have to make a significant investment just to get started on your DIY exhaust upgrade.
Section 3: Preparing for Installation
Preparation is key to any successful DIY project, and installing a catback or axleback exhaust system is no exception. To get started, make sure you have the necessary replacement exhaust system ready and inspected for any defects. Ensure that all the components are included in the kit and that they match the specifications for your vehicle.
Next, it's time to gather information. You can either refer to your vehicle's service manual or look for online resources specific to your make and model. These resources will provide you with crucial information on how to safely lift your car or truck, where the exhaust system components are located, and how to remove the old exhaust system.
Section 4: The Installation Process
Now that you're prepared and have the tools ready, let's dive into the installation process step by step:
-
Lift Your Vehicle: Use the jack to lift your car or truck, and secure it in place with jack stands. Safety is paramount, so ensure your vehicle is stable before proceeding.
-
Locate and Remove the Old Exhaust: Follow your vehicle's specific instructions to locate and remove the old exhaust system. This typically involves removing bolts, hangers, and any other attachments.
-
Install the New System: Begin by attaching the new exhaust system in the reverse order of removal. Be sure to tighten all bolts securely.
-
Adjust and Align: Pay close attention to the alignment of the new exhaust system, ensuring it fits snugly and doesn't hang too low or too high. Adjust as necessary.
-
Secure Hangers: Reattach any rubber hangers or brackets that hold the exhaust in place. Ensure they are secure to prevent rattling.
-
Double-Check Everything: Before lowering your vehicle, double-check that all bolts are tightened, and there are no loose components.
Section 5: Benefits of DIY Installation
Aside from the satisfaction of completing a project yourself, there are several significant benefits to installing your own catback or axleback exhaust:
-
Cost Savings: Muffler shops often charge for both labor and the parts. By doing it yourself, you can save a substantial amount of money.
-
Customization: You have full control over the installation process, allowing you to customize your exhaust system to your liking.
-
Learning Experience: It's a fantastic opportunity to learn more about your vehicle's mechanics and gain valuable DIY skills.
-
Flexibility: You can install your exhaust system at your own pace, without the need to schedule an appointment or leave your vehicle at a shop.
Section 6: Troubleshooting and Final Tips
While the DIY route is incredibly rewarding, you might encounter some challenges along the way. Common issues include stubborn bolts, rusty components, or difficulty aligning the exhaust properly. Patience and perseverance are your best allies in these situations. If you encounter a problem you can't resolve, don't hesitate to seek advice from online forums or automotive communities.
Before you hit the road with your newly installed catback or axleback exhaust, give your vehicle a test run. Listen for any unusual noises or vibrations. If everything sounds and feels right, you're good to go!
In conclusion, installing your own catback or axleback exhaust system is not only a feasible DIY project but also an excellent way to enhance your car or truck's performance and sound. With a basic set of tools, some preparation, and patience, you can save money, gain valuable skills, and enjoy the satisfaction of a job well done. So, why wait? Roll up your sleeves and embark on a journey of automotive improvement!


